Fixing BIOS Settings

Updated at July 16th, 2025
Incorrect BIOS settings can result in a the following issues:
- A Blue screen error when trying to startup the computer
- Wake on LAN and scheduled tasks in Deep Freeze Console not functioning properly
- Starting computers remotely from LanSchool not functioning properly
Follow the steps below to select the correct BIOS settings:
Step 1 - With the computer turned off, click the power button to start it up. As soon as you do this, begin rapidly pressing F12 on the keyboard (If it is a wireless keyboard, you may have to also hold the “FN” key while pressing F12). After the Dell screen shows up, you should be redirected to the boot options menu. If this does not work with a wireless keyboard, you may have to locate a wired keyboard and use it instead.
Step 2 - Click on Bios Setup.
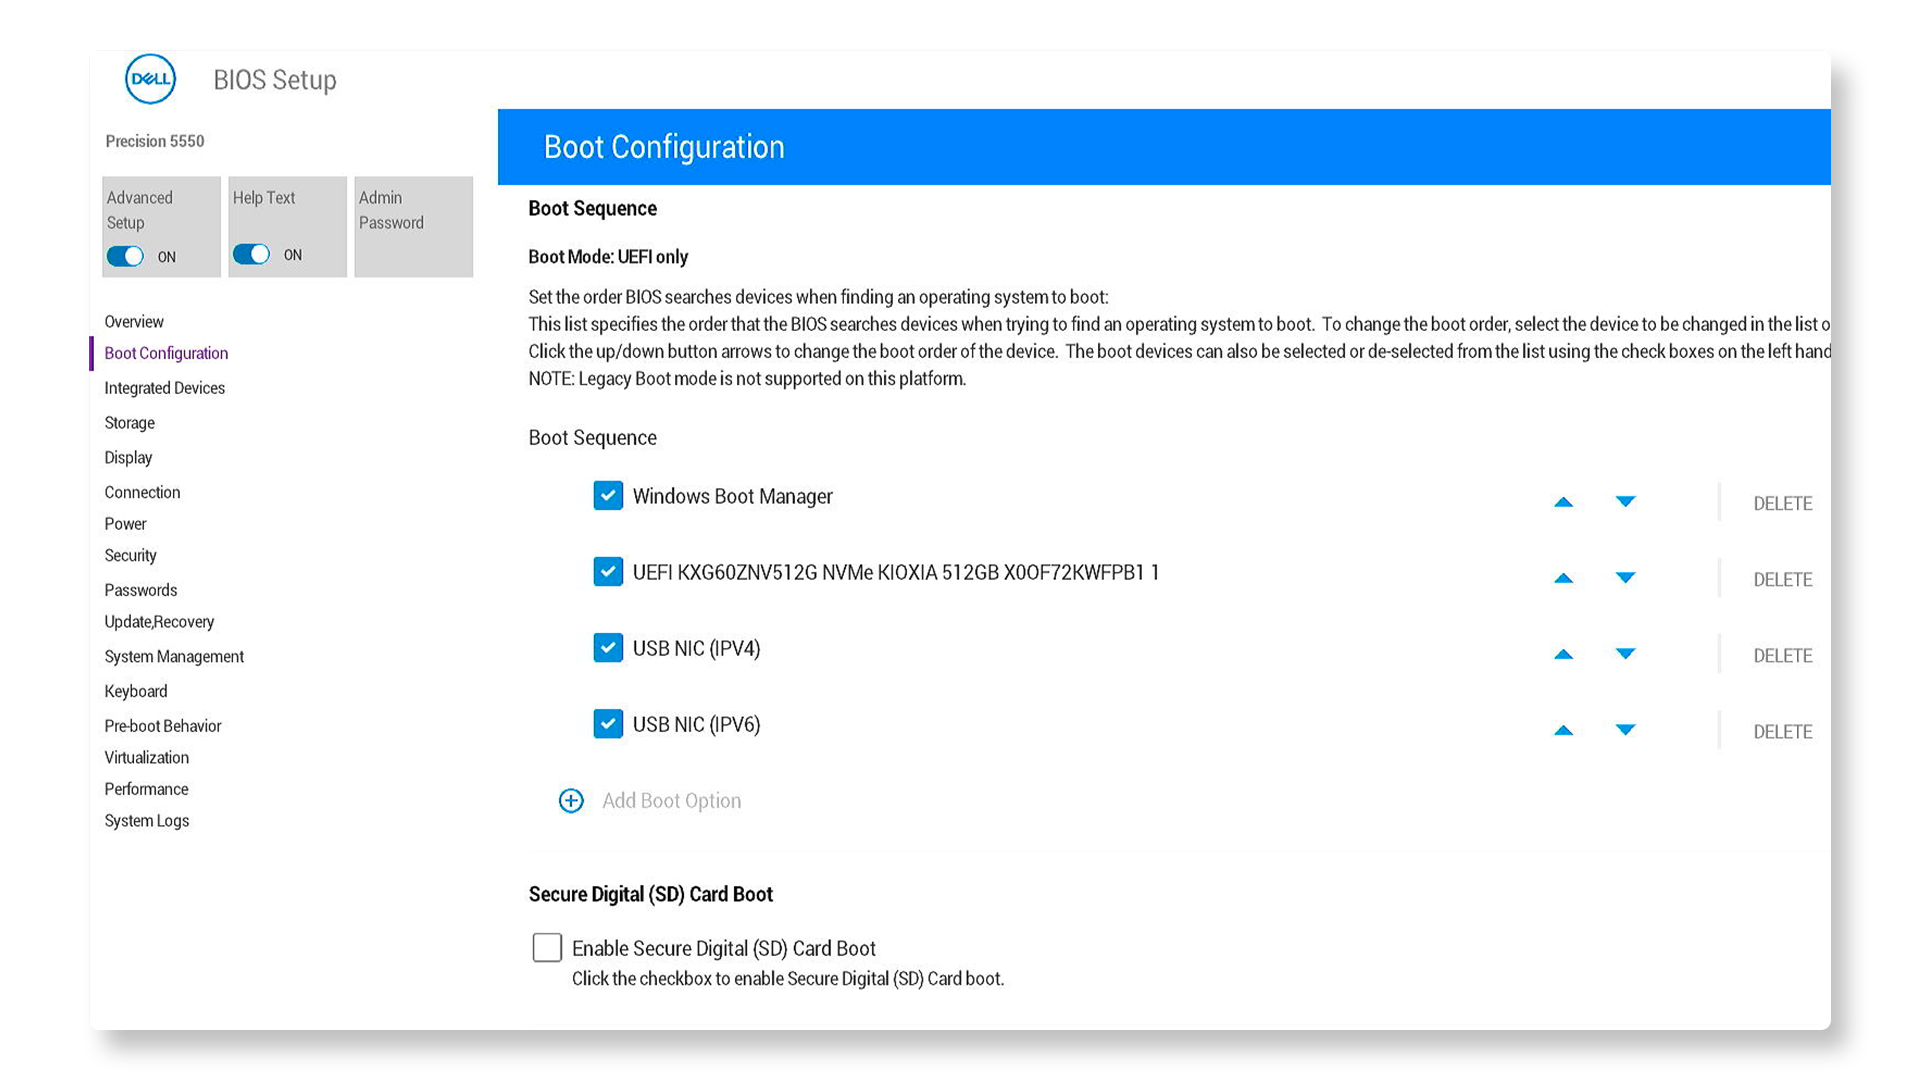
Step 3 - Select Boot Configuration in the left pane.
Step 4 - Check that the computer's hard drive is shown in this list. It should be the only list item with a large capacity of 200GB or larger. In the example below, the second item on the list has 512GB, this is the hard drive. If the hard drive is not shown, then there is a hardware issue. Let us know at support@clsonline.com so that we can contact Dell to replace the hard drive.
Step 5 - Scroll down in the boot configuration page until you see “Secure Boot.” Make sure this is disabled. (If this setting does not exist for your computer model, move to the next step).
Step 6 - Select Storage in the left pane. Under "SATA/NVMe Operation" make sure that AHCI is selected.
Step 7 - Select Power in the left pane. Find the “Deep Sleep” settings. Make sure this setting is disabled. (In some Dell models, this will instead be listed under “Power Management” in the left pane).
Step 8 - Select System Management in the left pane. Find the settings for “Wake on LAN.” Make sure the selected option is “LAN or WLAN.” (In some Dell models, this will instead be listed under “Power Management” in the left pane).
Step 9 - Apply settings and exit the Bios Setup menu. This will automatically restart the computer.
If these setting changes did not fix the issue you are experiencing, contact us for further troubleshooting at support@clsonline.com.